How to Customize the UI with UIExtensions in Foxit PDF SDK for Android
Foxit PDF SDK for Android supports UI customization including the ability to show or hide the top or bottom bar, show or hide a specific panel, items in the top bar, view settings bar and More Menu view, which is convenient for developers to modify the UI elements in the context of the built-in UI framework. Using the UIExtensions project, users can easily give their applications the seamless experience of using Foxit technology quickly.
If you are using any of Foxit’s plug-ins such as Cordova, React Native, Xamarin or in your application, using the UIExtensions project is the best way for you to customize your UI. Please use this article for customizing your app’s UI in your framework projects.
Note: For your convenience, we will show you how to customize UI elements through APIs in the “complete_pdf_viewer” demo found in the “samples” folder. We assume that you have not modified the “uiextensions_config.json” file in the demos, which means that all of the built-in UI in the UI Extensions Component are enabled.
Customizing top/bottom bar
In the top/bottom bar, you can perform the following operations:
- Show or hide the top/bottom bar.
- Add a custom item at any position.
- Remove a specific item.
- Remove all of the items in the toolbar.
- Show or hide a specific item.
- Add a custom toolbar.
- Remove a specific toolbar.
- Set background color for the toolbar.
- Get the number of the items in a specific location of the toolbar.
Table 4-1 lists the related APIs which are used to customize the top/bottom bar.
Table 4-1
[table id=36 /]
There are two important enumerations which are defined to locate the position that you want to add a new item or remove an existing item.
enum BarName {
 TOP_BAR,
 BOTTOM_BAR;
 }
enum TB_Position {
 Position_LT,
 Position_CENTER,
 Position_RB;
 }
Note:
- The top bar or bottom bar can add up to 7 items.
- To add an item to the top bar, please set the BaseBar.TB_Position to Position_LT or Position_RB. To add an item to the bottom bar, please set the BaseBar.TB_Position to Position_CENTER. Otherwise, the items may overlap.
- The bottom bar is only one part, and the top bar is divided into two parts, so that there are three parts for the toolbar, and each part has a separate index. (See Figure 4-2)
- For the best UI display, it is recommended to limit the character count of text for the top bar within 15 and for the bottom bar within 8. If you don’t, the view layout may be in disorder.
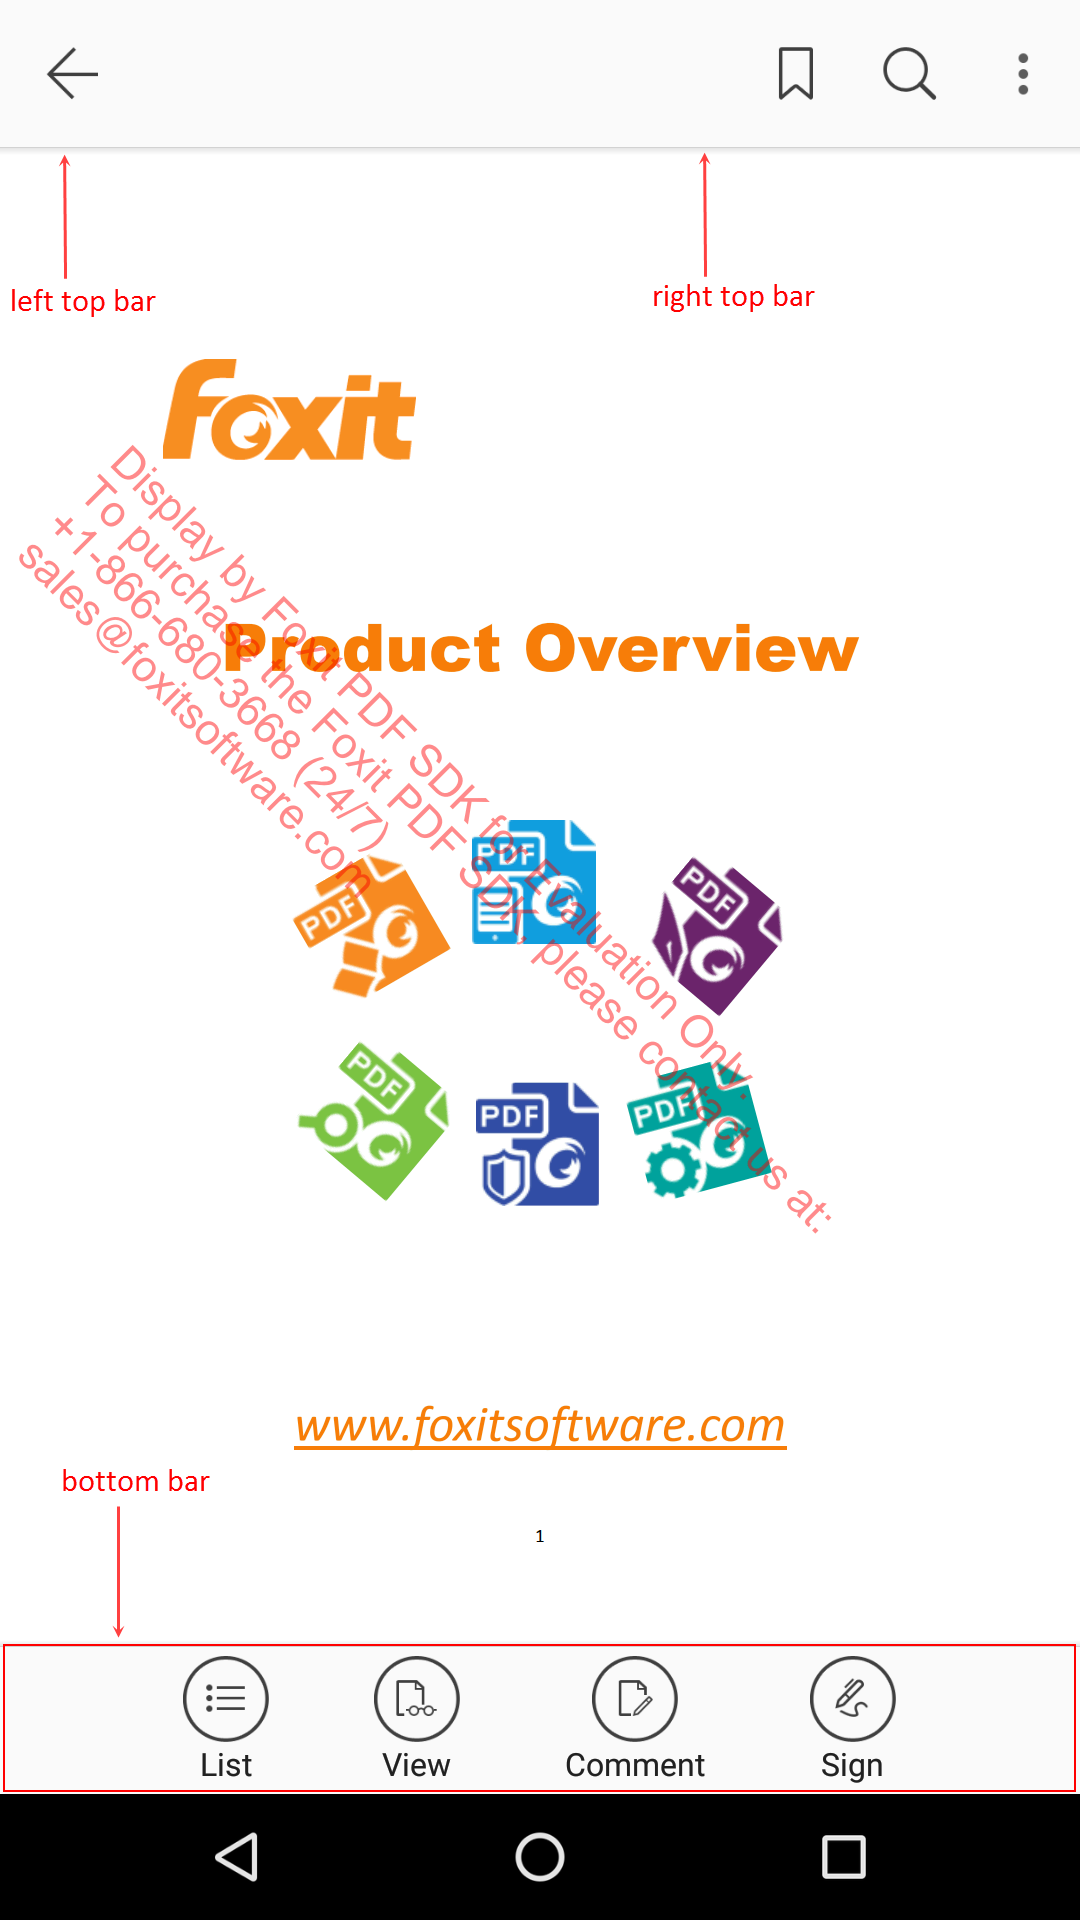
Figure 4-2
In the following examples, we will show you how to customize the top/bottom bar through APIs in the “complete_pdf_viewer” demo found in the “samples” folder.
Load the “complete_pdf_viewer” demo in Android Studio. Add the sample code to the “PDFReaderFragment.java” file (after the code “mUiExtensionsManager = new UIExtensionsManager(getActivity().getApplicationContext(), pdfViewerCtrl, config);”).
Example 1: Hide the whole top bar.
mUiExtensionsManager.enableTopToolbar(false);
Before:

After:

Example 2: Hide the whole bottom bar.
mUiExtensionsManager.enableBottomToolbar(false);
Before:

After:

Example 3: Add an item in the left top bar at the second position.
BaseItemImpl mTopItem1 = new BaseItemImpl(getContext());
mTopItem1.setImageResource(R.drawable.rd_annot_item_delete_selector);
mTopItem1.setOnClickListener(new View.OnClickListener() {
 @Override
 public void onClick(View v) {
 UIToast.getInstance(getActivity()).show("Add an item in the left top bar at the second position.");
 }
});
mUiExtensionsManager.getBarManager().addItem(IBarsHandler.BarName.TOP_BAR, BaseBar.TB_Position.Position_LT, mTopItem1, 1);
The result after running the demo:

Example 4: Add an item in the right top bar at the first position.
BaseItemImpl mTopItem2 = new BaseItemImpl(getContext());
mTopItem2.setImageResource(R.drawable.annot_fileattachment_selector);
mTopItem2.setOnClickListener(new View.OnClickListener() {
 @Override
 public void onClick(View v) {
 UIToast.getInstance(getActivity()).show("Add an item in the right top bar at the first position");
 }
});
mUiExtensionsManager.getBarManager().addItem(IBarsHandler.BarName.TOP_BAR, BaseBar.TB_Position.Position_RB, mTopItem2, 0);
The result after running the demo:

Example 5: Add an item to the bottom bar at the first position.
mUiExtensionsManager.getBarManager().addItem(IBarsHandler.BarName.BOTTOM_BAR, BaseBar.TB_Position.Position_CENTER,
 R.string.action_more, R.drawable.rd_bar_more_selector, 0, new IBarsHandler.IItemClickListener() {
 @Override
 public void onClick(View v) {
 UIToast.getInstance(getActivity()).show("Add an item to the bottom bar at the first position.");
 }
 });
The result after running the demo:

Example 6: Add an item with custom style to the bottom bar at the second position.
int circleResId = R.drawable.rd_bar_circle_bg_selector;
int textSize = getResources().getDimensionPixelSize(R.dimen.ux_text_height_toolbar);
int textColorResId = R.color.ux_text_color_button_colour;
int interval = getResources().getDimensionPixelSize(R.dimen.ux_toolbar_button_icon_text_vert_interval);
CircleItemImpl mSettingBtn = new CircleItemImpl(this.getContext());
mSettingBtn.setImageResource(R.drawable.rd_annot_create_ok_selector);
mSettingBtn.setText("style");
mSettingBtn.setRelation(BaseItemImpl.RELATION_BELOW);
mSettingBtn.setCircleRes(circleResId);
mSettingBtn.setInterval(interval);
mSettingBtn.setTextSize(AppDisplay.getInstance(getContext()).px2dp(textSize));
mSettingBtn.setTextColorResource(textColorResId);
mSettingBtn.setOnClickListener(new View.OnClickListener() {
 @Override
 public void onClick(View v) {
 UIToast.getInstance(getActivity()).show("Add an item with custom style to the bottom bar at the second position.");
 }
});
mUiExtensionsManager.getBarManager().addItem(IBarsHandler.BarName.BOTTOM_BAR, BaseBar.TB_Position.Position_CENTER, mSettingBtn, 1);
The result after running the demo:

Example 7: Remove an item by index (remove the first item in the bottom bar).
mUiExtensionsManager.getBarManager().removeItem(IBarsHandler.BarName.BOTTOM_BAR, BaseBar.TB_Position.Position_CENTER,0);
The result after running the demo:

Example 8: Remove an item by BaseItem object (remove a custom item from the top bar that you added before).
mUiExtensionsManager.getBarManager().removeItem(IBarsHandler.BarName.TOP_BAR, BaseBar.TB_Position.Position_LT, mTopItem1);
Before: (See Example 3)
After:

Example 9: Remove all the items in the bottom bar.
mUiExtensionsManager.getBarManager().removeAllItems(IBarsHandler.BarName.BOTTOM_BAR);
Before:

After:

Example 10: Add two items in the left top bar to control to show and hide the “more menu” item.
// Get and save the item that you want to show or hide.
BaseBarManager baseBarManager = (BaseBarManager) mUiExtensionsManager.getBarManager();
final BaseItemImpl moreItem = (BaseItemImpl) baseBarManager.getItem(IBarsHandler.BarName.TOP_BAR, BaseBar.TB_Position.Position_RB, ToolbarItemConfig.ITEM_TOPBAR_MORE_TAG);

// Add a buttom in the left top bar to hide the "moreItem" item.
BaseItemImpl mTopItem = new BaseItemImpl(getContext());
mTopItem.setImageResource(R.drawable.rd_annot_item_delete_selector);
mTopItem.setOnClickListener(new View.OnClickListener() {
 @Override
 public void onClick(View v) {
 // Hide the "moreItem" item.
 mUiExtensionsManager.getBarManager().removeItem(IBarsHandler.BarName.TOP_BAR, BaseBar.TB_Position.Position_RB, moreItem);
 }
});
mUiExtensionsManager.getBarManager().addItem(IBarsHandler.BarName.TOP_BAR, BaseBar.TB_Position.Position_LT, mTopItem, 1);

// Add a buttom in the left top bar to show the "moreItem" item.
BaseItemImpl mTopItem2 = new BaseItemImpl(getContext());
mTopItem2.setImageResource(R.drawable.annot_reply_item_add_selector);
mTopItem2.setOnClickListener(new View.OnClickListener() {
 @Override
 public void onClick(View v) {
 // Show the "moreItem" item.
 mUiExtensionsManager.getBarManager().addItem(IBarsHandler.BarName.TOP_BAR, BaseBar.TB_Position.Position_RB, moreItem ,2);
 }
});
mUiExtensionsManager.getBarManager().addItem(IBarsHandler.BarName.TOP_BAR, BaseBar.TB_Position.Position_LT, mTopItem2, 2);
The result after running the demo, the top bar will look like as follows:

Click the trashcan, then the “more menu” will be hidden as follows:

Click the plus, then the “more menu” will appear as follows:
Example 11: Remove the whole bottom bar.
mUiExtensionsManager.getBarManager().removeToolBar(IBarsHandler.BarName.BOTTOM_BAR);
Example 12: Add a custom toolbar. (add a custom layout file “test_top_layout”)
View topView = View.inflate(getContext(), R.layout.test_top_layout, null);
mUiExtensionsManager.getBarManager().addCustomToolBar(IBarsHandler.BarName.TOP_BAR, topView);
Customizing to show/hide a specific Panel
To show or hide a specific panel (See Figure 4-3, includes “Reading Bookmarks”, “Outline”, “Annotations” and “Attachments” panels, just clicks List at the bottom bar to find it), you can use the following APIs listed in the Table 4-2.
Table 4-2
| public void setPanelHidden(boolean isHidden, PanelSpec.PanelType panelType) | To show or hide a panel according to the PanelType. |
| public boolean isHiddenPanel(PanelSpec.PanelType panelType) | Return the current value in setPanelHidden. |
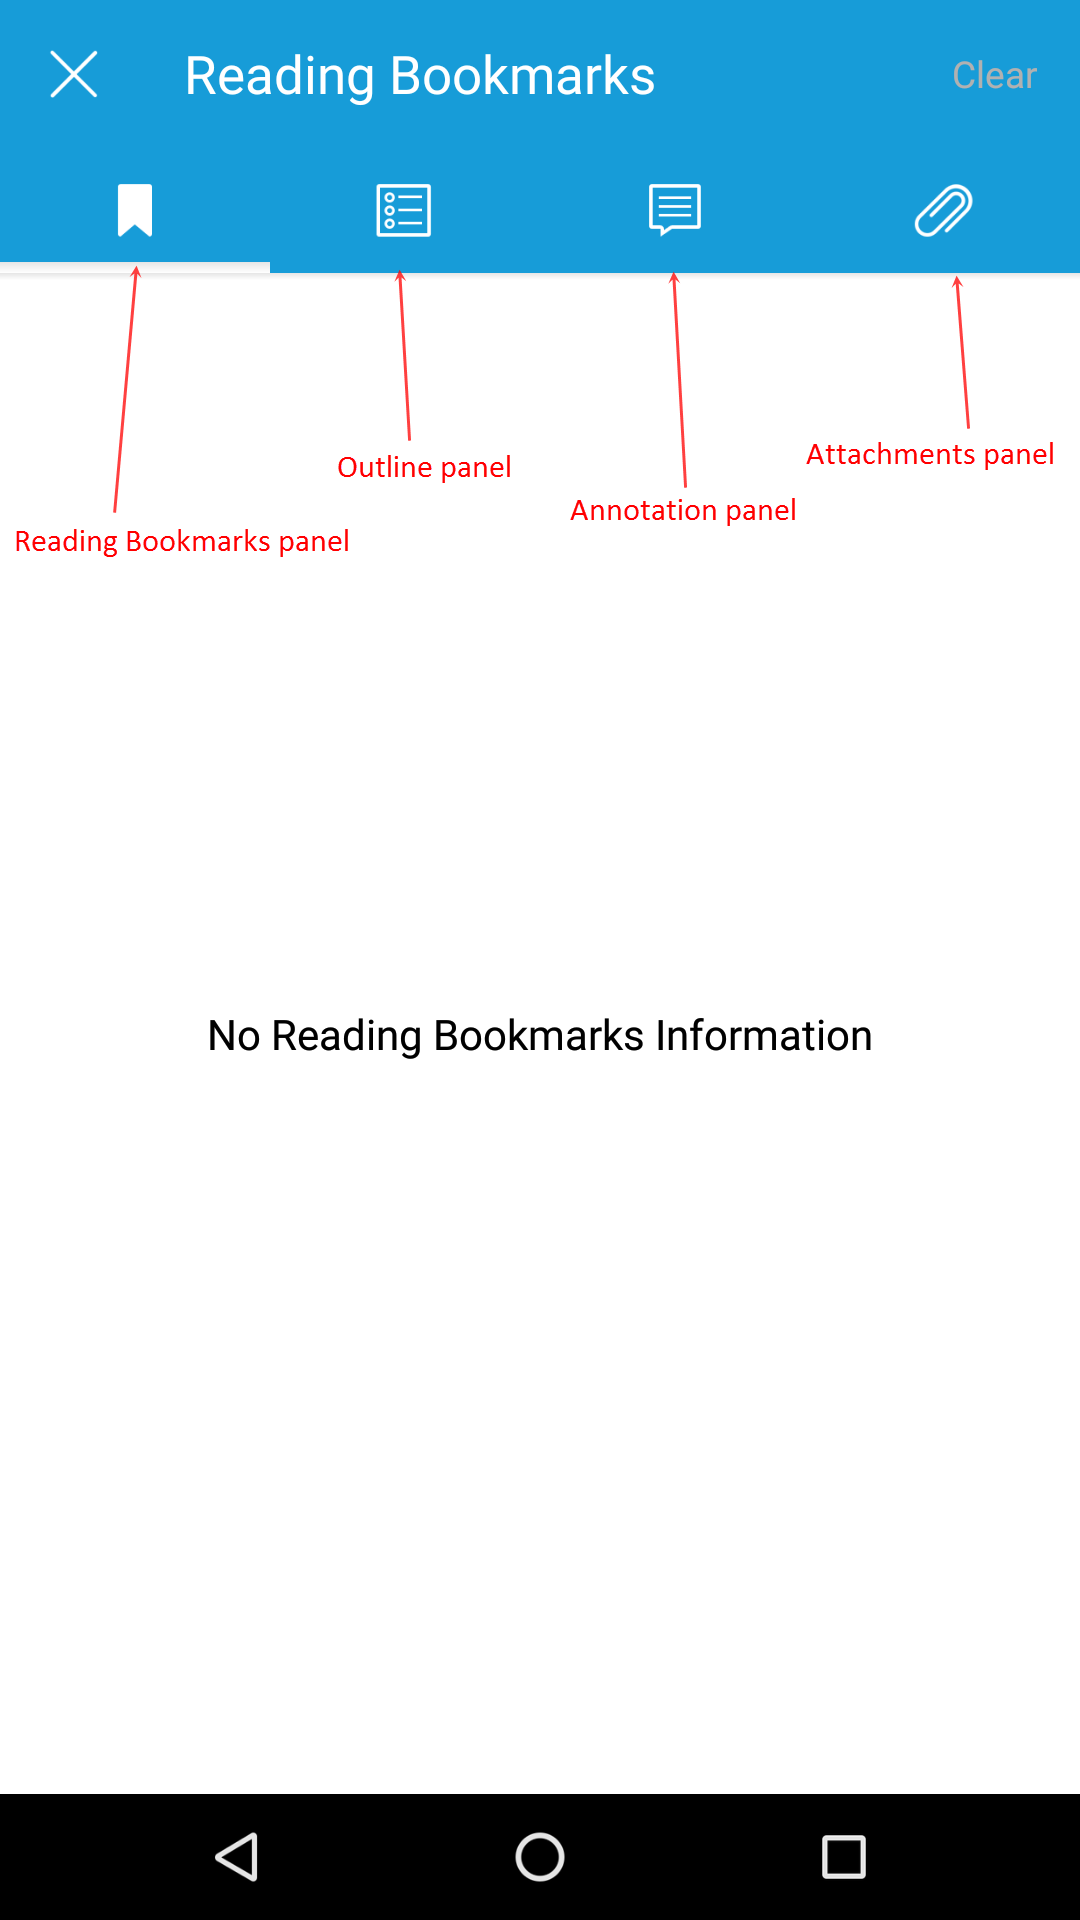
Figure 4-3
Note: To show or hide a specific panel through APIs, please mark sure the corresponding features in the configuration file is set to “true”. Otherwise, the API settings will not have any effect.
In this section, we only give an example to show you how to show or hide a specific panel through APIs in the “complete_pdf_viewer” demo found in the “samples” folder. Just take the “Outline” panel as an example, and for others panels, you only need to change the PanelType. The corresponding relation between panels and PanelType are as follows:
| Panel | PanelType |
| Reading Bookmarks | PanelSpec.PanelType.ReadingBookmarks |
| Outline | PanelSpec.PanelType.Outline |
| Annotations | PanelSpec.PanelType.Annotations |
| Attachments | PanelSpec.PanelType.Attachments |
Load the “complete_pdf_viewer” demo in Android Studio. Add the sample code to the “PDFReaderFragment.java” file (after the code “mUiExtensionsManager = new UIExtensionsManager(getActivity().getApplicationContext(), pdfViewerCtrl, config);”).
Example: Add an item in the left top bar at the second position to control whether to show or hide the “Outline” panel.
BaseItemImpl mTopItem = new BaseItemImpl(getActivity());
mTopItem.setImageResource(R.drawable.rd_annot_item_delete_selector);
mTopItem.setOnClickListener(new View.OnClickListener() {
 @Override
 public void onClick(View v) {
 if (mUiExtensionsManager.isHiddenPanel(PanelSpec.PanelType.Outline)){
 mUiExtensionsManager.setPanelHidden(false, PanelSpec.PanelType.Outline);
 UIToast.getInstance(getActivity()).show("show Outline");
 } else {
 mUiExtensionsManager.setPanelHidden(true, PanelSpec.PanelType.Outline);
 UIToast.getInstance(getActivity()).show("hide outline");
 }
 }
});
mUiExtensionsManager.getBarManager().addItem(IBarsHandler.BarName.TOP_BAR, BaseBar.TB_Position.Position_LT, mTopItem, 1);
Here, we add a button in the top bar to try this function. Click the button, if the “Outline” panel exists, then hides it, otherwise shows it.
After running the demo, click the “delete” button, it will pop up “hide Outline” as follows:
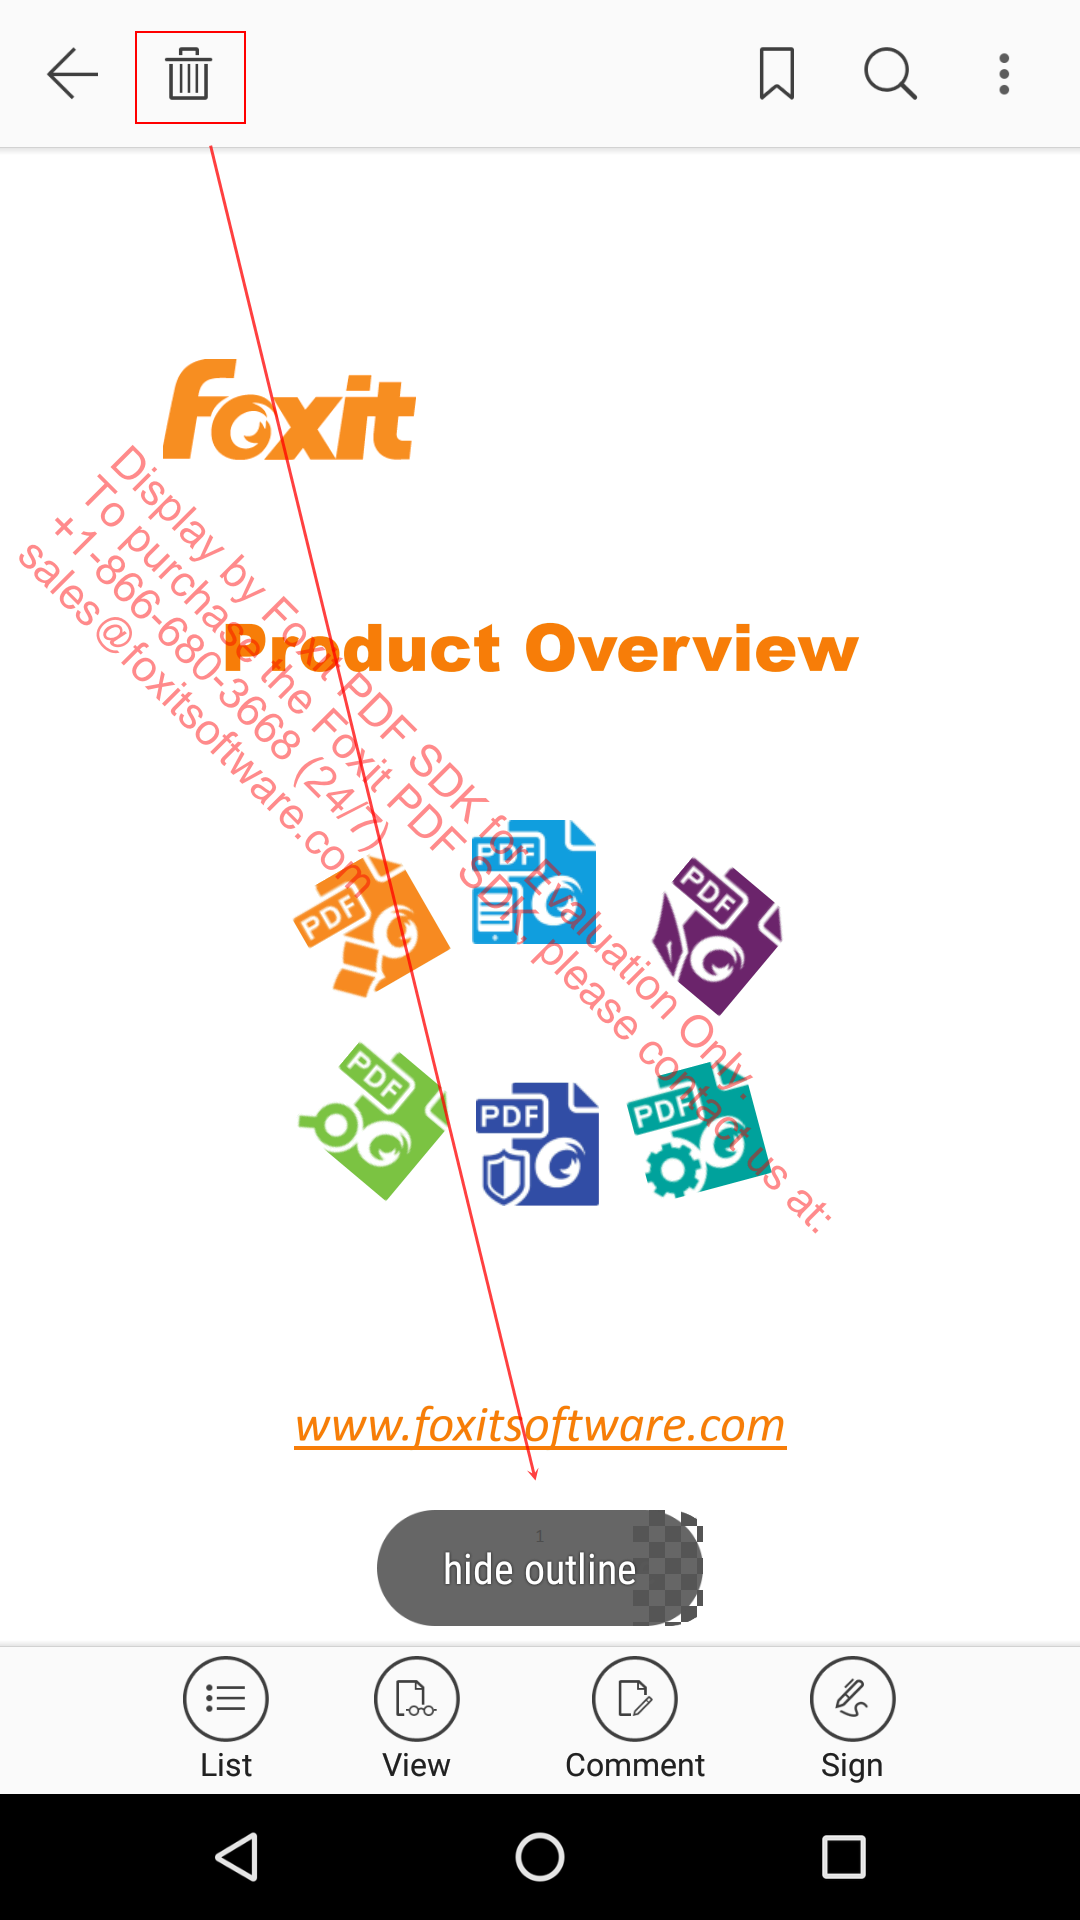
Then, tap List in the bottom bar, and you will see the “Outline” panel has been hidden (See Figure 4-4).
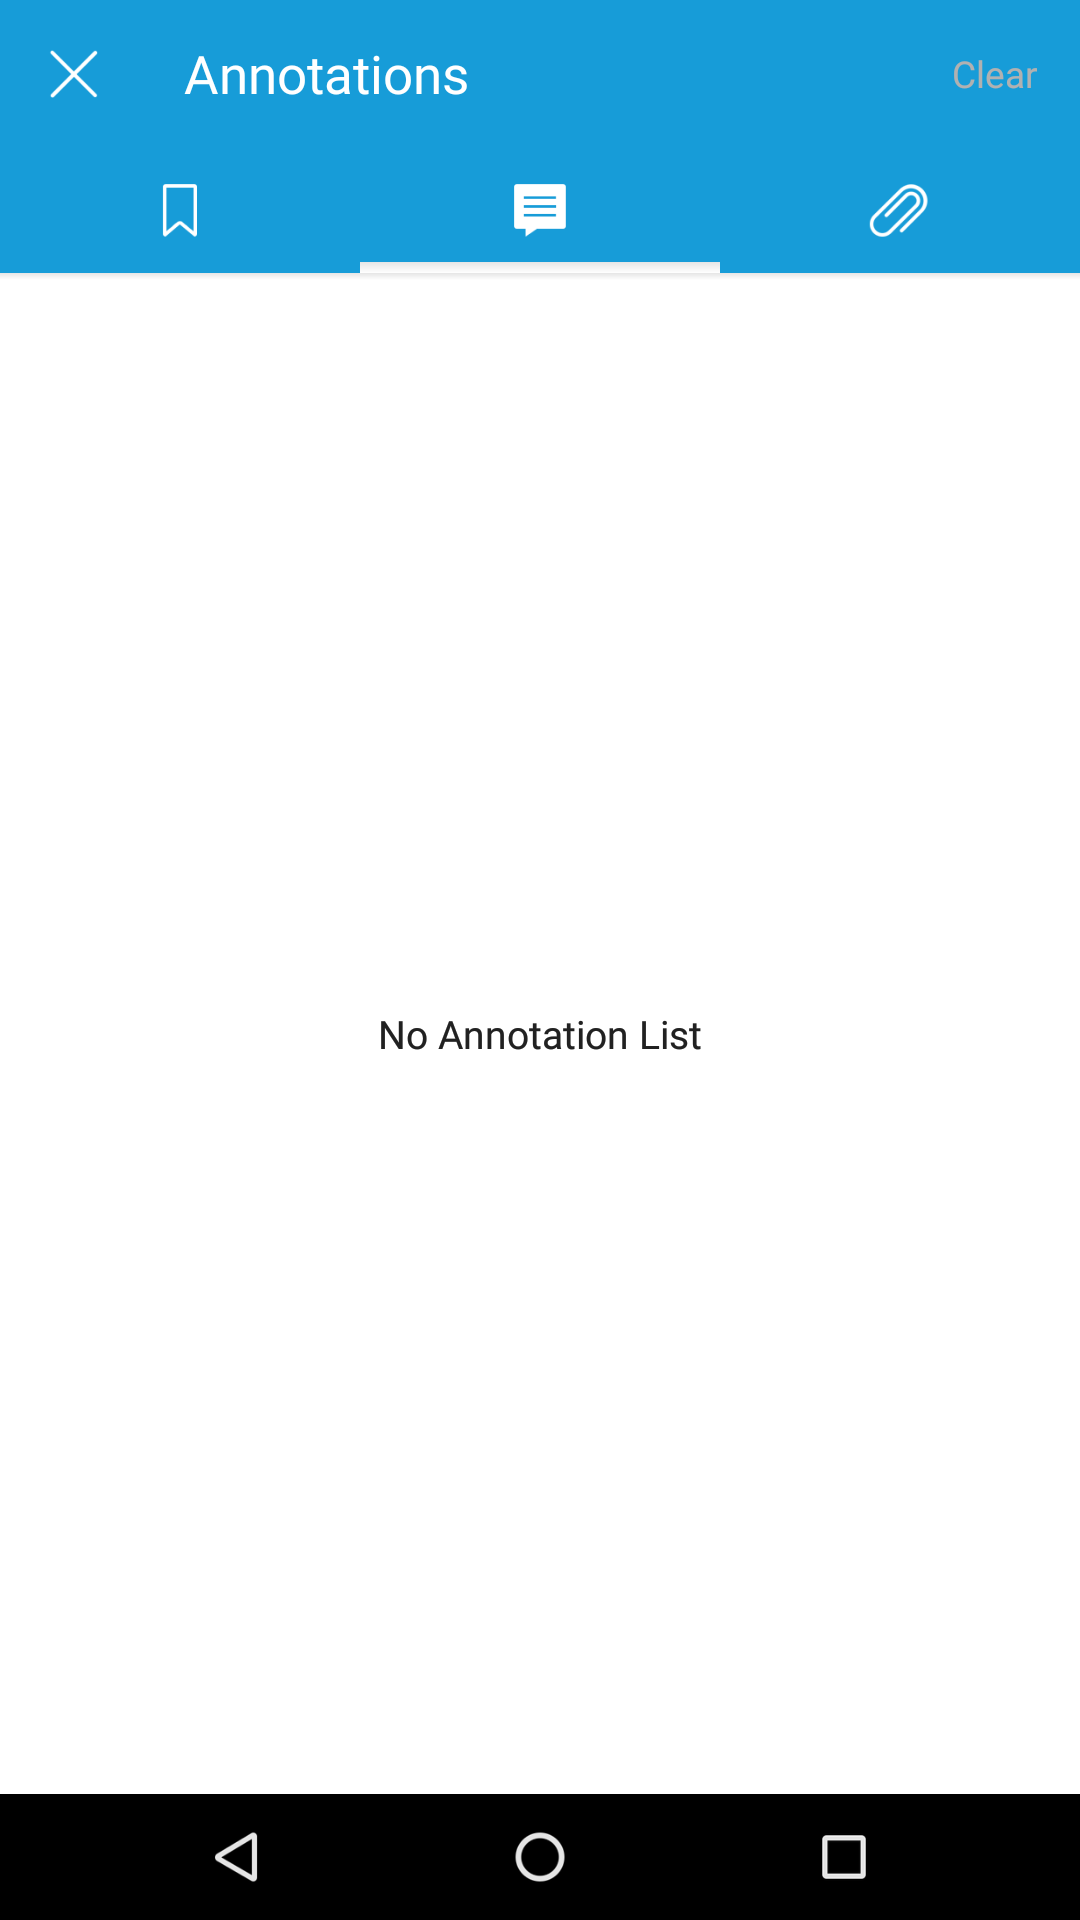
Figure 4-4
For Reading Bookmarks, Annotations, and Attachments panels, you only need to change the PanelType. Just try it.
Customizing to show/hide the UI elements in the View setting bar
To show or hide the UI elements in the View setting bar (See Figure 4-5, just clicks View at the bottom bar to find it), you only need to use the following API:
public void setVisibility(int type, int visibility)
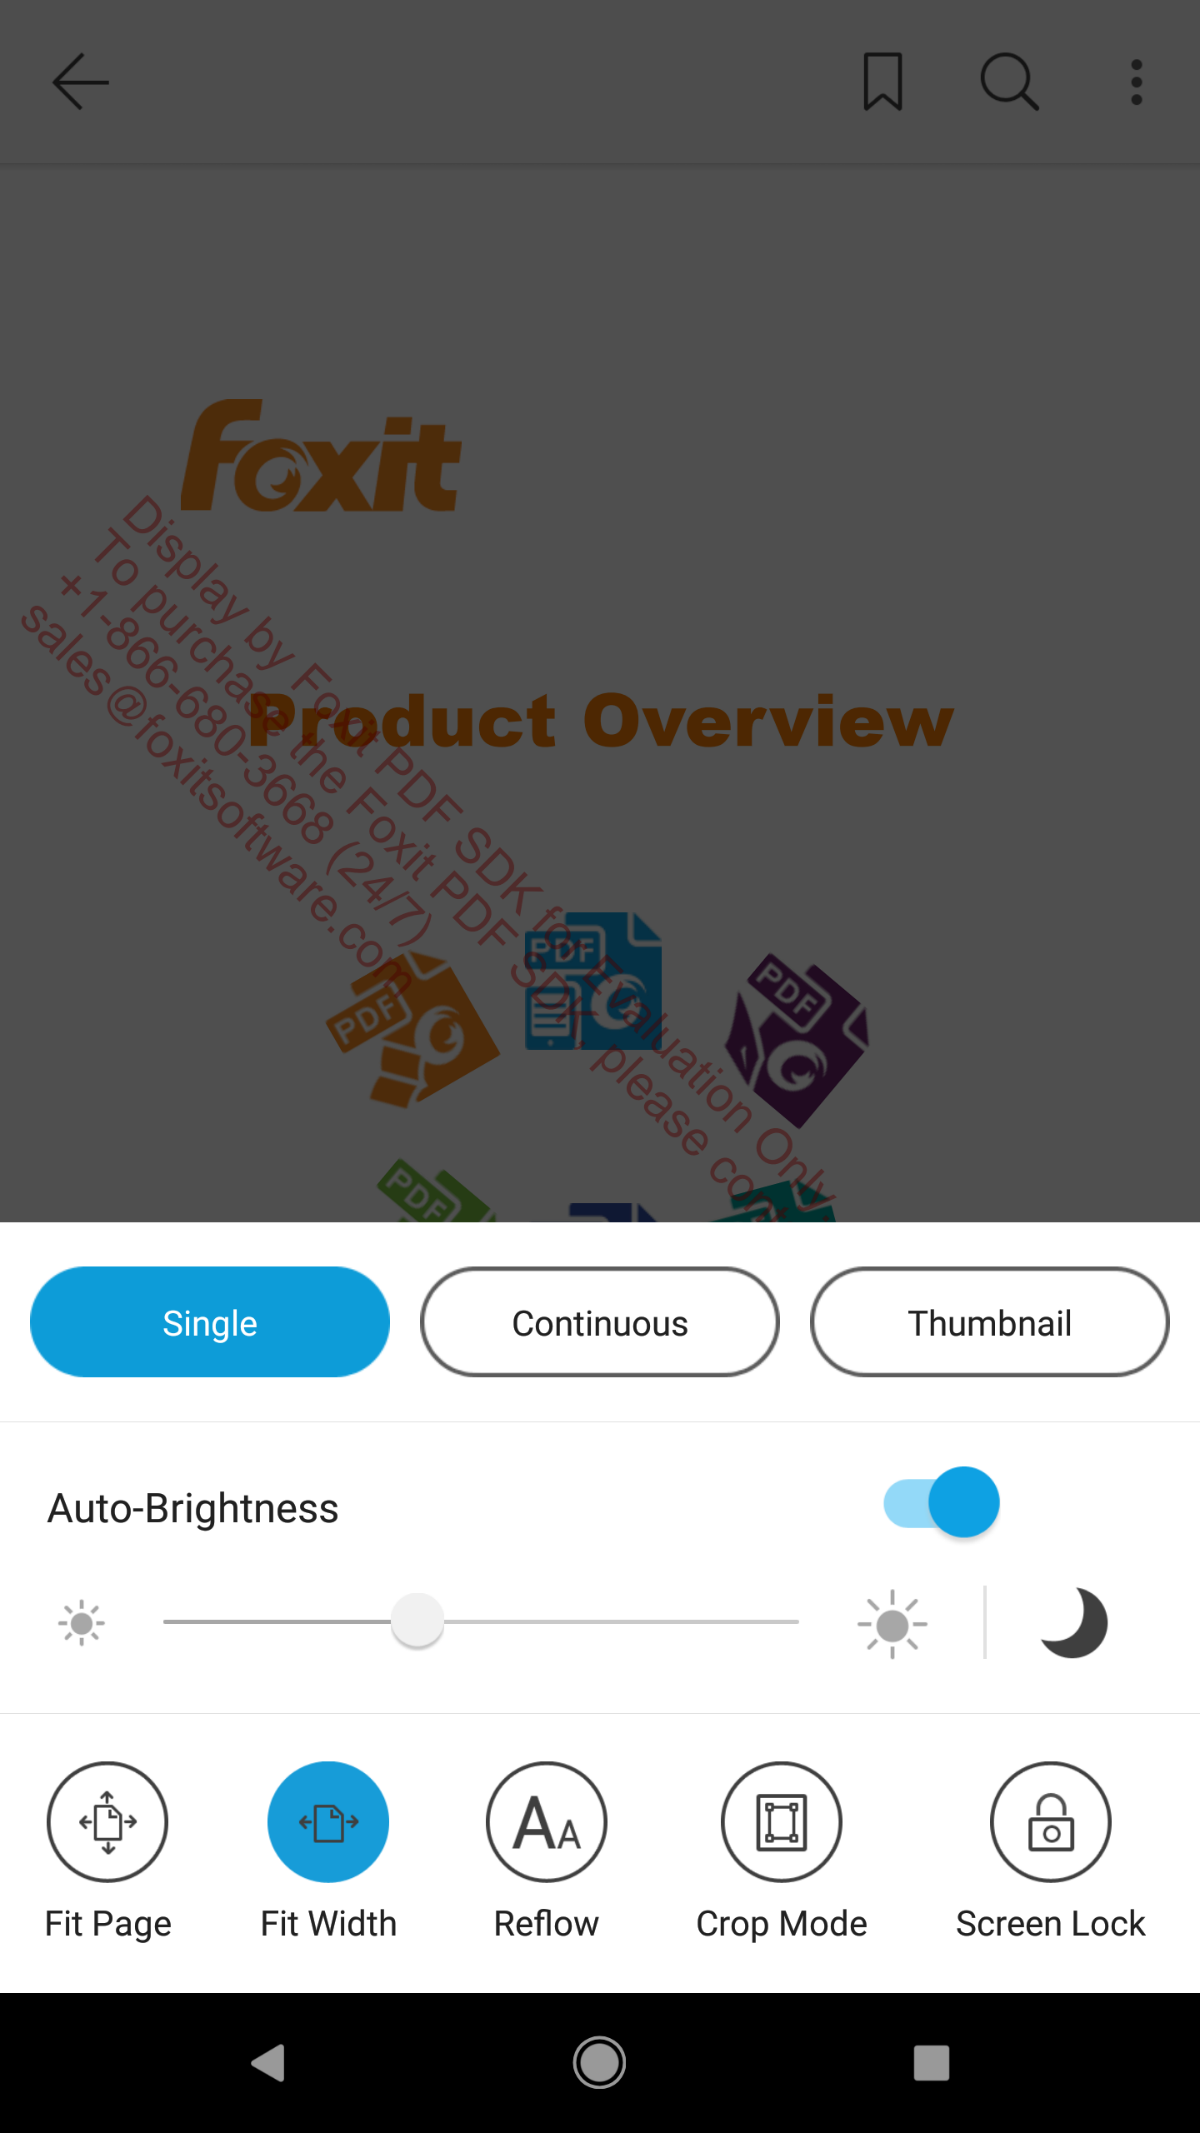
Figure 4-5
The value of the parameter “type” can be set as follows, which maps the items in the View setting bar.
| type | integer |
| IMultiLineBar.TYPE_LIGHT | 1 |
| IMultiLineBar.TYPE_DAYNIGHT | 2 |
| IMultiLineBar.TYPE_SYSLIGHT | 4 |
| IMultiLineBar.TYPE_SINGLEPAGE | 8 |
| IMultiLineBar.TYPE_CONTINUOUSPAGE | 16 |
| IMultiLineBar.TYPE_THUMBNAIL | 32 |
| IMultiLineBar.TYPE_LOCKSCREEN | 64 |
| IMultiLineBar.TYPE_REFLOW | 128 |
| IMultiLineBar.TYPE_CROP | 256 |
| IMultiLineBar.TYPE_FACING_MODE | 288 |
| IMultiLineBar.TYPE_COVER_MODE | 320 |
| IMultiLineBar.TYPE_PANZOOM | 384 |
| IMultiLineBar.TYPE_TYPE_FITPAGE | 512 |
| IMultiLineBar.TYPE_FITWIDTH | 544 |
The value of the parameter “visibility” can be set as follows:
| visibility | integer | description |
| View.VISIBLE | 0 | The view is visible. |
| View.INVISIBLE | 4 | This view is invisible, but it still takes up space for layout purposes. |
| View.GONE | 8 | This view is invisible, and it doesn’t take any space for layout |
In this section, we only take “Reflow” item as an example to show you how to show or hide the UI elements in the View setting bar through APIs in the “complete_pdf_viewer” demo found in the “samples” folder. For other UI elements, you only need to change the “type“.
Load the “complete_pdf_viewer” demo in Android Studio. Add the sample code to the “PDFReaderFragment.java” file (after the code “mUiExtensionsManager = new UIExtensionsManager(getActivity().getApplicationContext(), pdfViewerCtrl, config);”).
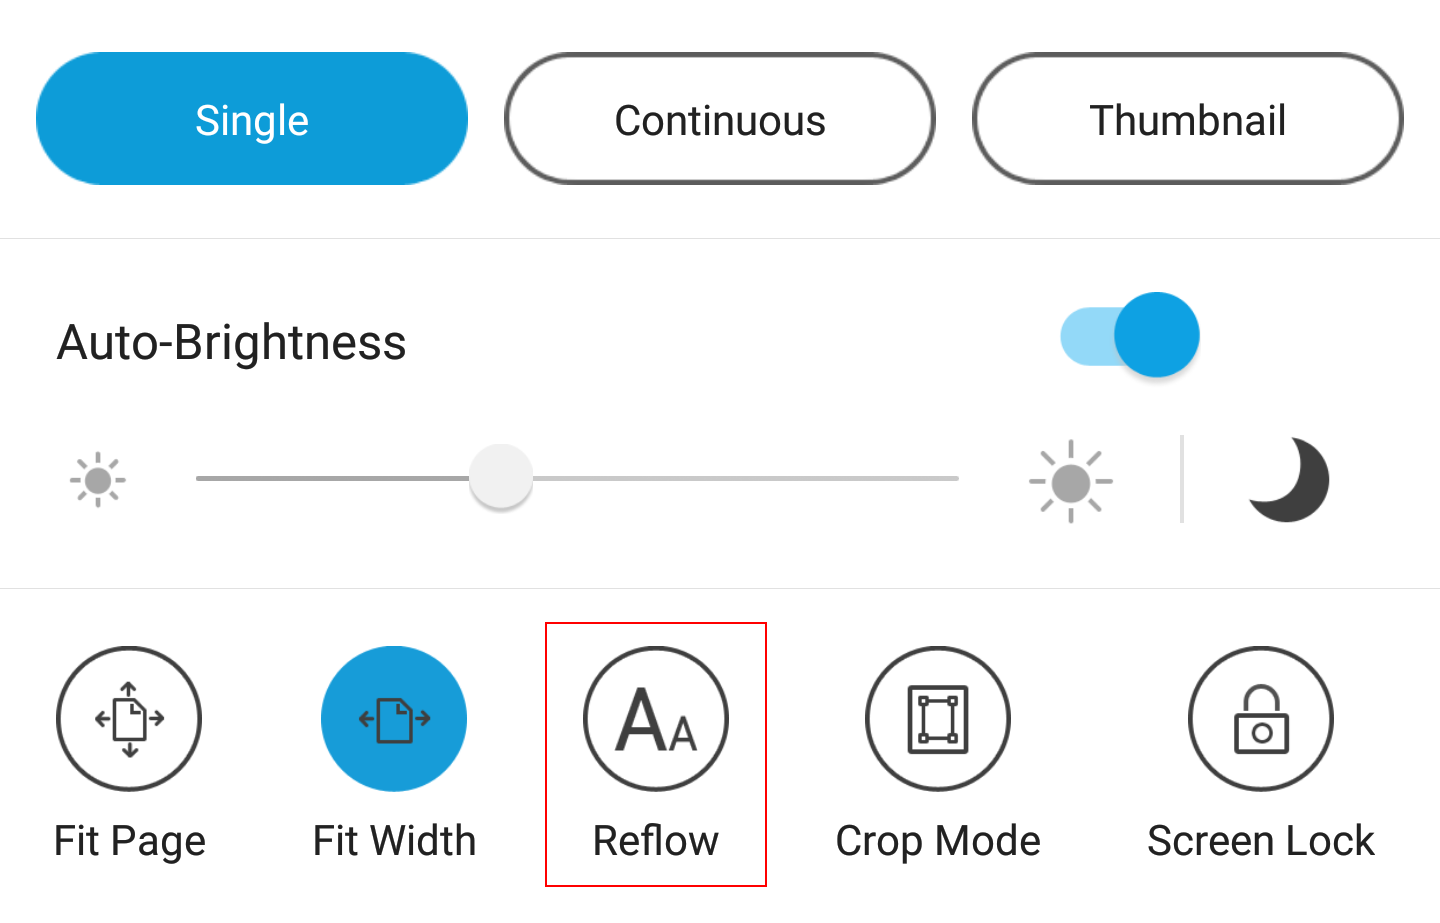
Example 1: To hide the Reflow item in the View setting bar without changing the layout.
mUiExtensionsManager.getSettingBar().setVisibility(IMultiLineBar.TYPE_REFLOW, View.INVISIBLE);
Before:
After:
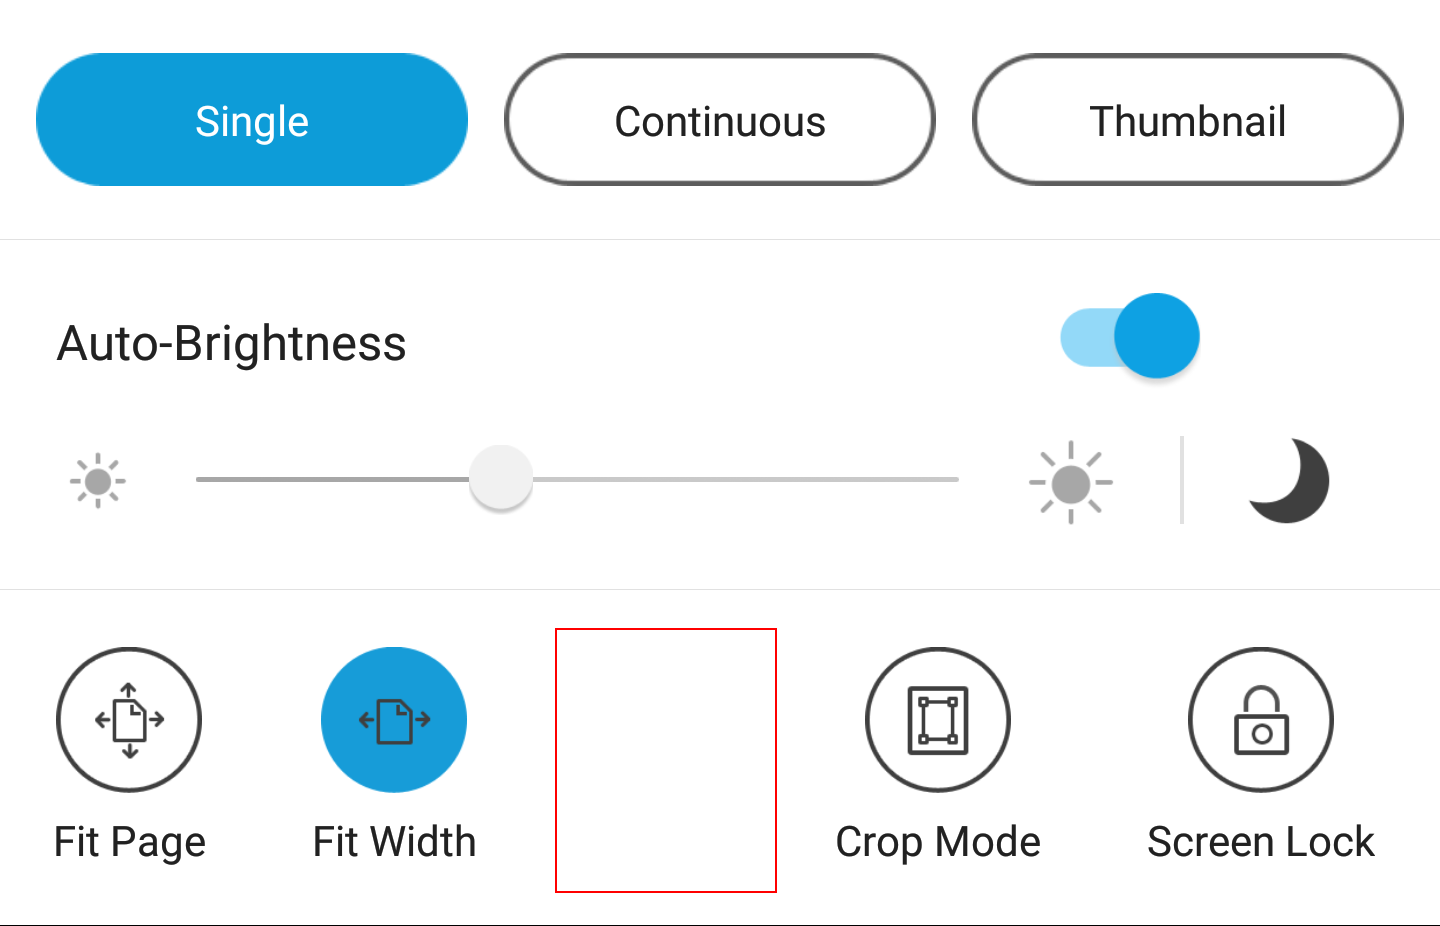
Example 2: To hide the Reflow item in the View setting bar with changing the layout.
mUiExtensionsManager.getSettingBar().setVisibility(IMultiLineBar.TYPE_REFLOW, View.GONE);
Before:
After:
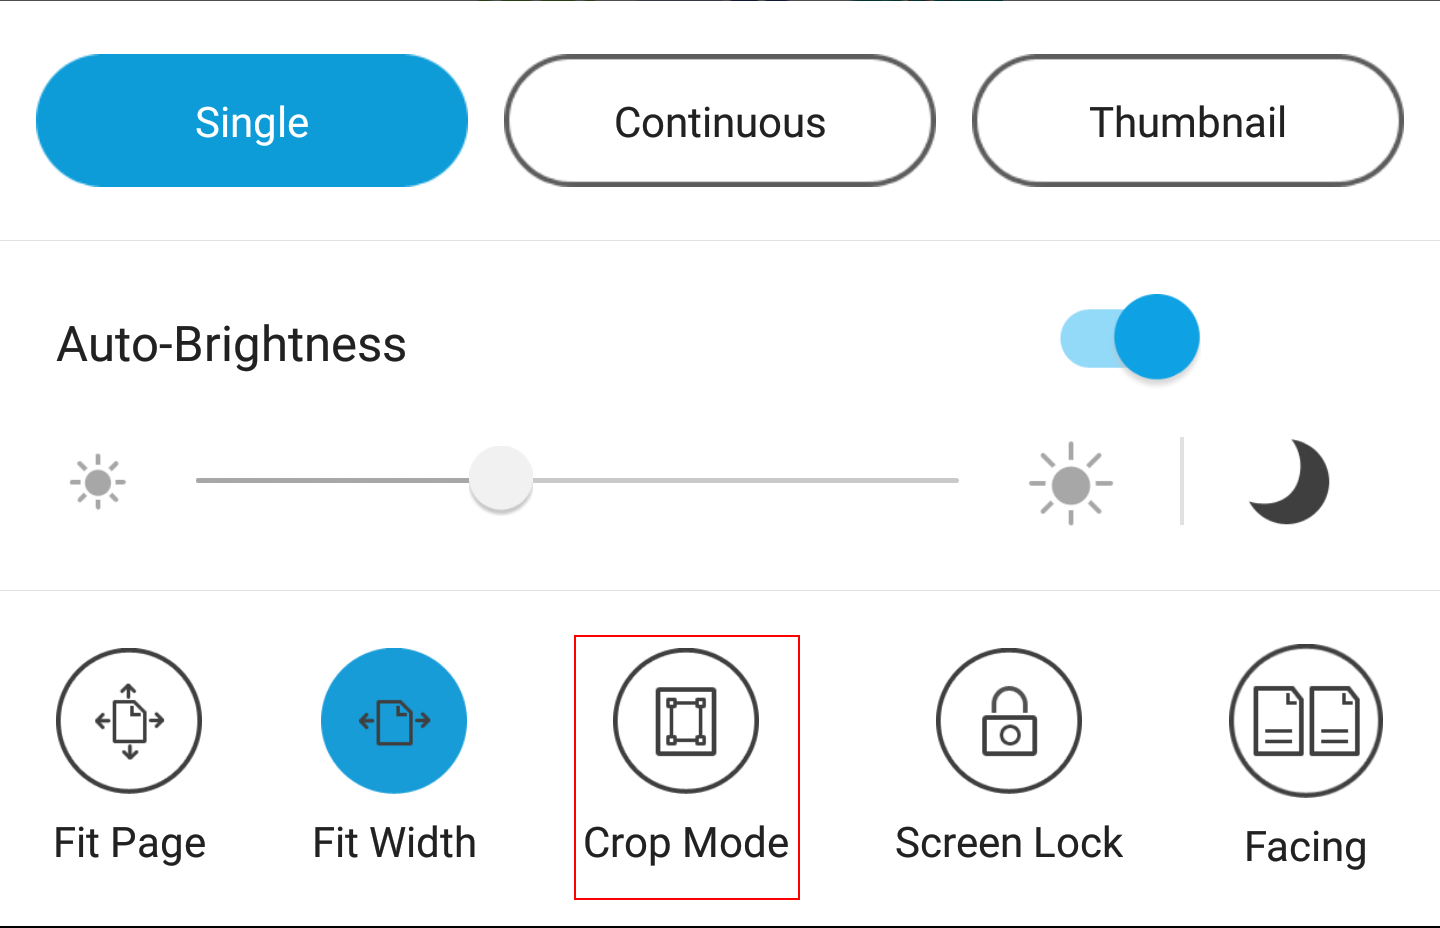
For other items in the View setting bar, you can refer to the above example, and just need to change the value of the parameter “type” in setVisibility interface.
To show one of the UI elements in the View setting bar, just set the value of the parameter “visibility” in setVisibility interface to “View.VISIBLE“.
Customizing to show/hide the UI elements in the More Menu view
To show or hide the More Menu item, please see “Customizing top/bottom bar” (see example 10).
To show or hide the UI elements in the More Menu view (See Figure 4-6, just click at the menu icon at the right top bar to find it), you can use the following APIs listed in the Table 4-3.
Table 4-3
| void setGroupVisibility(int visibility, int tag) | Set the enabled state of group according to “tag”. |
| void setItemVisibility(int visibility, int groupTag, int itemTag); | Set the enabled state of item according to “groupTag” and “itemTag”. |
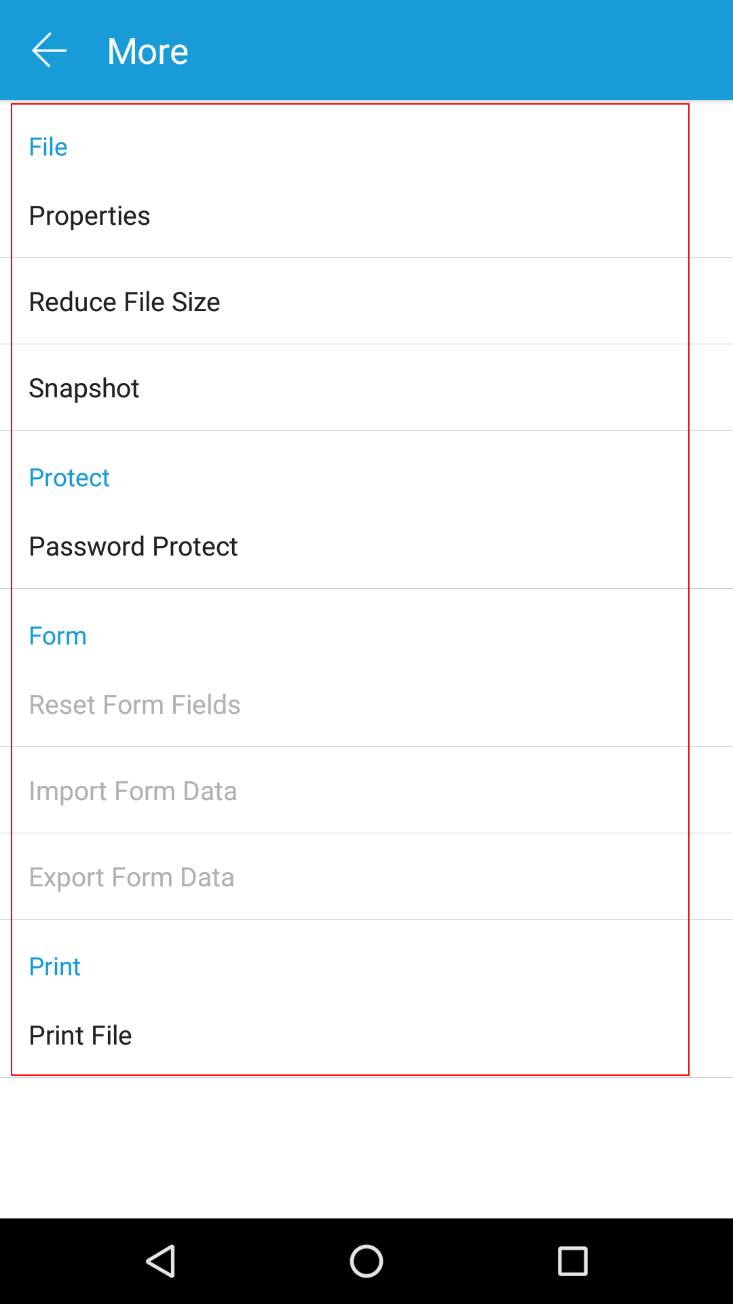
Figure 4-6
The value of the parameter “tag” in the setGroupVisibility interface or the “groupTag” in the setItemVisibility interface can be set as follows:
| tag | integer |
| GROUP_FILE | 100 |
| GROUP_PROTECT | 101 |
| GROUP_FORM | 102 |
| GROUP_PRINT | 103 |
The value of the parameter “itemTag” in the setItemVisibility interface can be set as follows:
| groupTag | itemTag | integer |
| GROUP_FILE | ITEM_DOCINFO | 0 |
| ITEM_REDUCE_FILE_SIZE | 1 | |
| ITEM_SNAPSHOT | 2 | |
| GROUP_PROTECT | ITEM_PASSWORD | 0 |
| ITEM_REMOVESECURITY_PASSWORD | 4 | |
| GROUP_FORM | ITEM_RESET_FORM | 0 |
| ITEM_IMPORT_FORM | 1 | |
| ITEM_EXPORT_FORM | 2 | |
| GROUP_PRINT | ITEM_PRINT_FILE | 0 |
The value of the parameter “visibility” in the setGroupVisibility and setItemVisibility interfaces can be set as follows:
| visibility | integer | description |
| View.VISIBLE | 0 | The view is visible. |
| View.INVISIBLE | 4 | This view is invisible, but it still takes up space for layout purposes. |
| View.GONE | 8 | This view is invisible, and it doesn’t take any space for layout. |
Note: For setItemVisibility interface, if you want to show or hide an itemTag, please make sure the corresponding groupTag has been set to “View.VISIBLE“. Otherwise, the settings will not have any effect.
In this section, we only take “GROUP_FILE” (File in the view) and “ITEM_DOCINFO” (Properties in the view) as an example to show you how to show or hide the UI elements in the More Menu view through APIs in the “complete_pdf_viewer” demo found in the “samples” folder. For other UI elements, you can refer to the following examples and only need to change the parameter value in the setGroupVisibility and setItemVisibility interfaces.
Load the “complete_pdf_viewer” demo in Android Studio. Add the sample code to the “PDFReaderFragment.java” file file (after the code “mUiExtensionsManager = new UIExtensionsManager(getActivity().getApplicationContext(), pdfViewerCtrl, config);”).
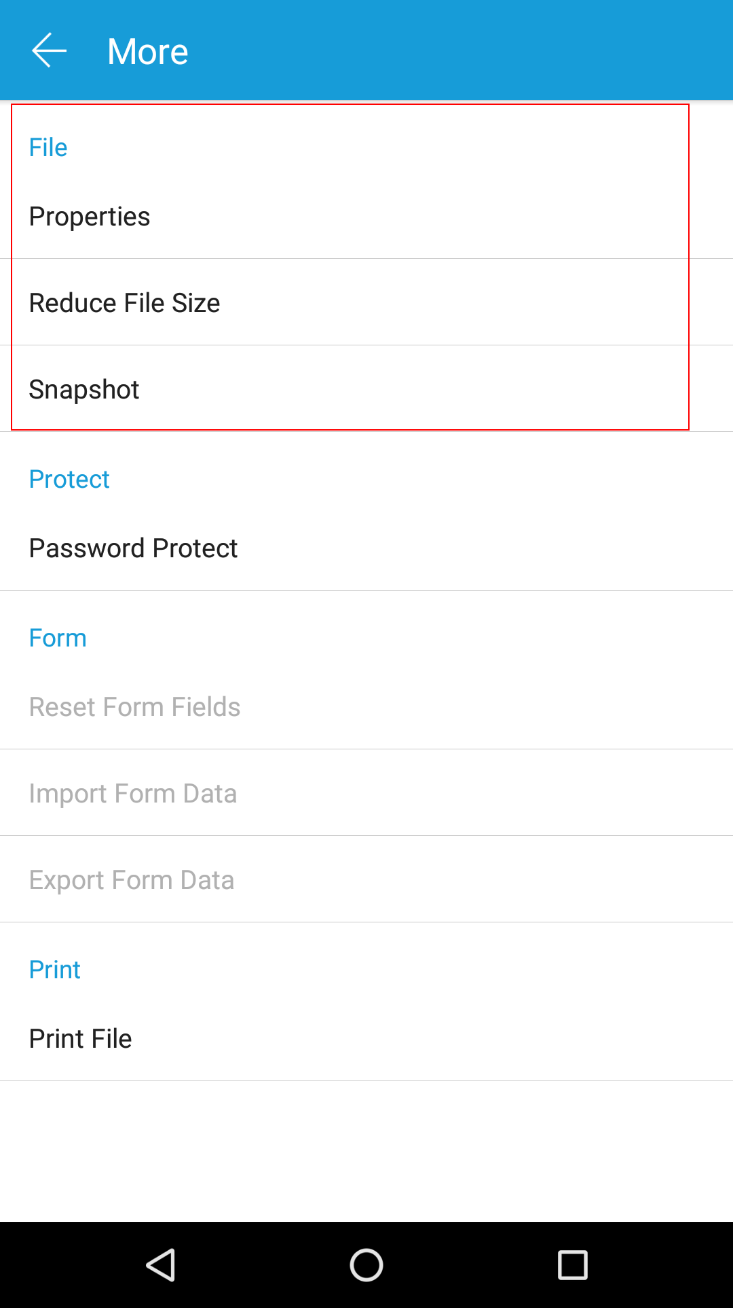
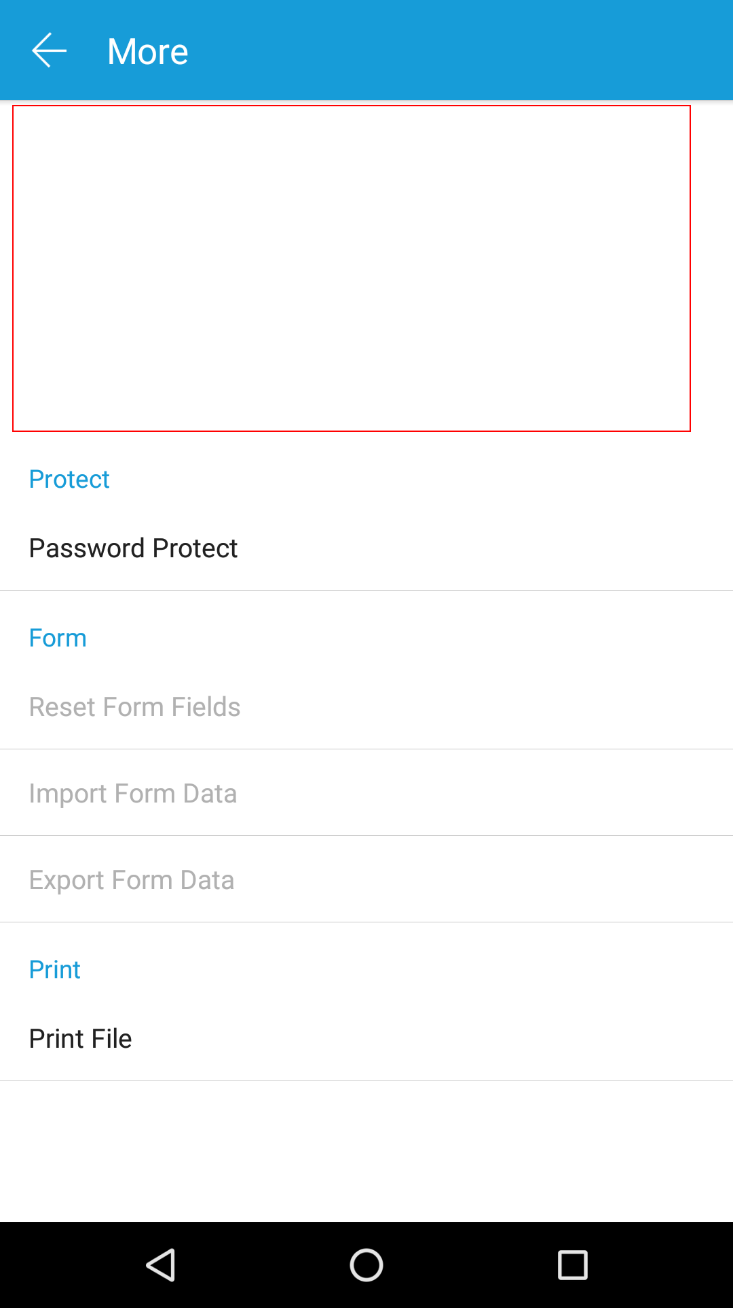
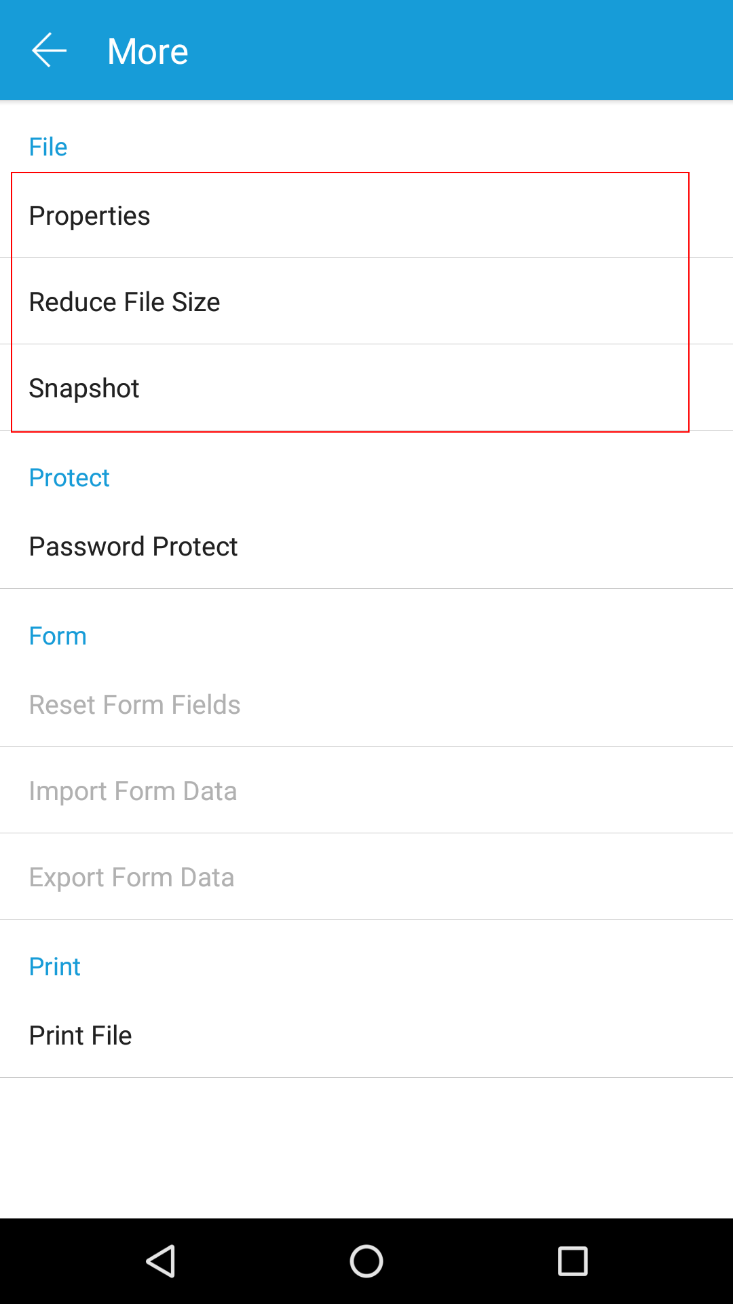
Example 1: Hide the “File” in the More Menu view without changing the layout.
// Get MenuViewImpl from MoreMenuModule.
MoreMenuModule moreMenuModule = (MoreMenuModule) mUiExtensionsManager.getModuleByName(Module.MODULE_MORE_MENU);
MenuViewImpl menuView = (MenuViewImpl) moreMenuModule.getMenuView();
menuView.setGroupVisibility(View.INVISIBLE, MoreMenuConfig.GROUP_FILE);
Before:
After:
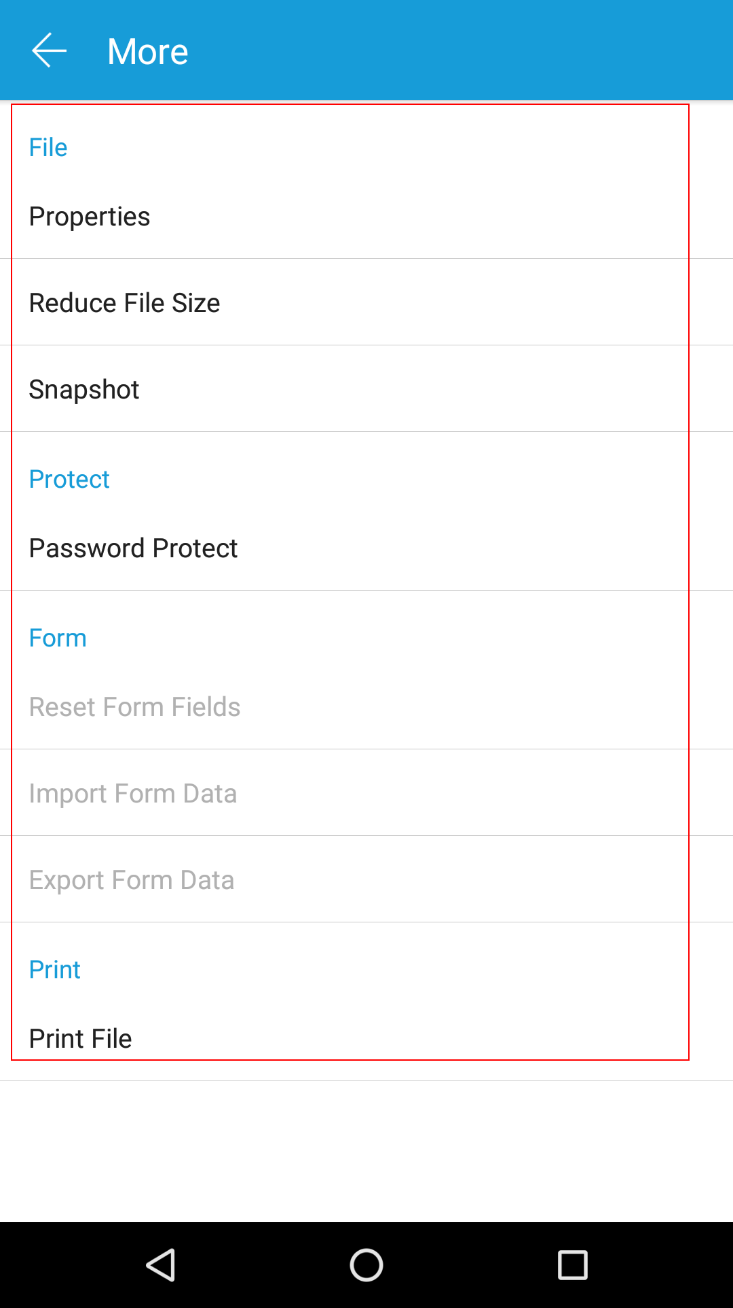
Example 2: Hide the “File” in the More Menu view with changing the layout.
// Get MenuViewImpl from MoreMenuModule.
MoreMenuModule moreMenuModule = (MoreMenuModule) mUiExtensionsManager.getModuleByName(Module.MODULE_MORE_MENU);
MenuViewImpl menuView = (MenuViewImpl) moreMenuModule.getMenuView();
menuView.setGroupVisibility(View.GONE, MoreMenuConfig.GROUP_FILE);
Before:
 After:

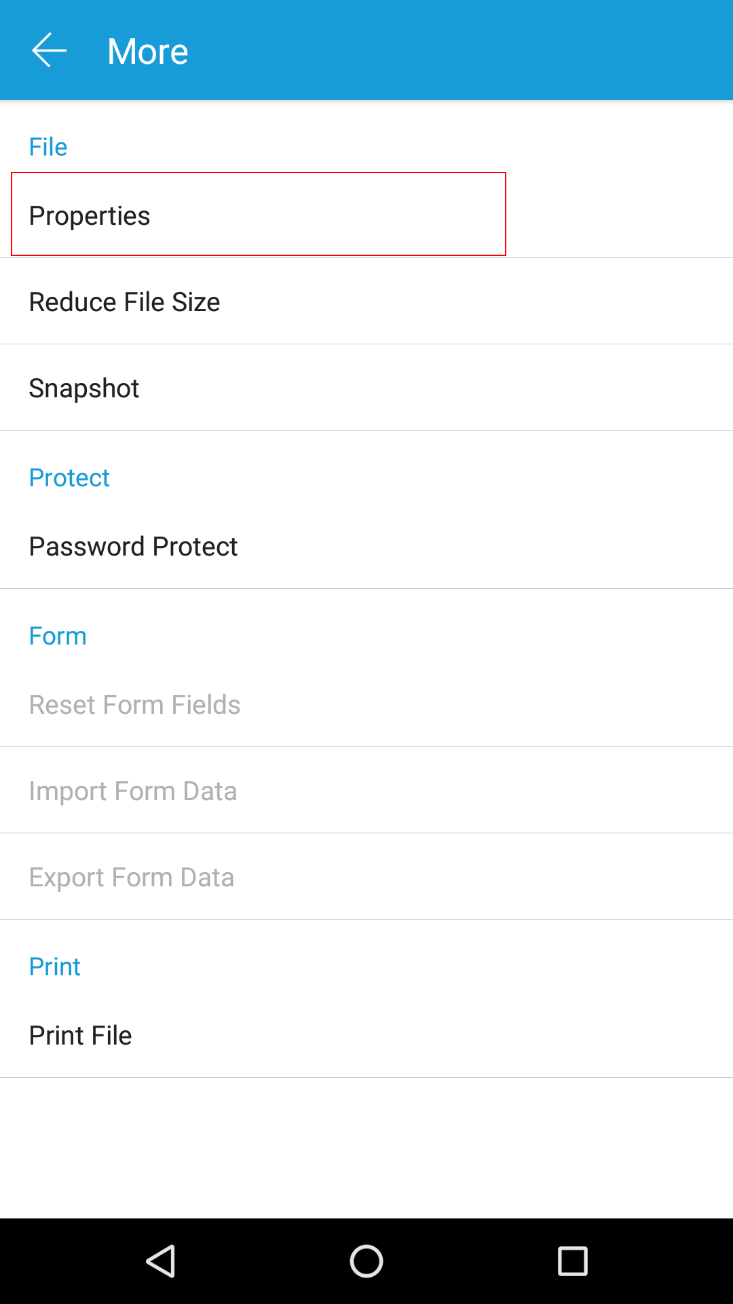
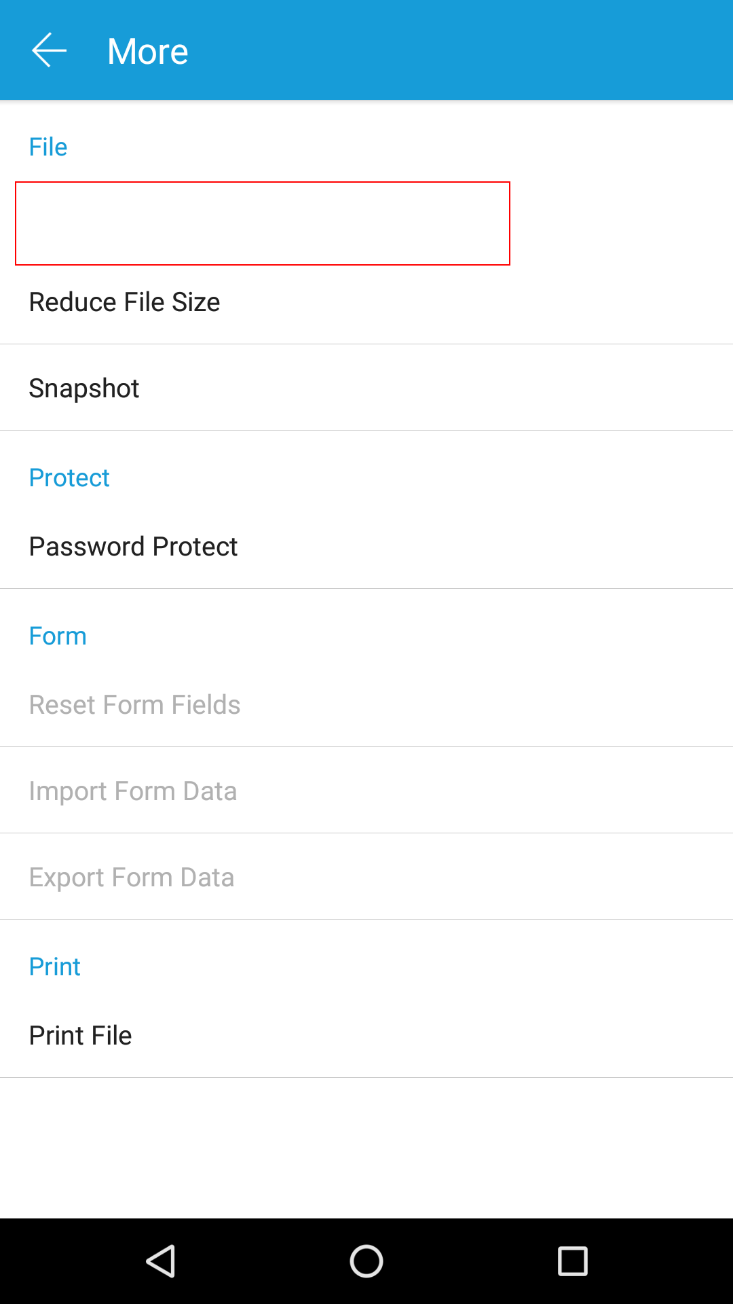
Example 3: Hide the “Properties” in the More Menu view without changing the layout.
// Get MenuViewImpl from MoreMenuModule.
MoreMenuModule moreMenuModule = (MoreMenuModule) mUiExtensionsManager.getModuleByName(Module.MODULE_MORE_MENU);
MenuViewImpl menuView = (MenuViewImpl) moreMenuModule.getMenuView();
menuView.setItemVisibility(View.INVISIBLE, MoreMenuConfig.GROUP_FILE, MoreMenuConfig.ITEM_DOCINFO);
Before:
 After:
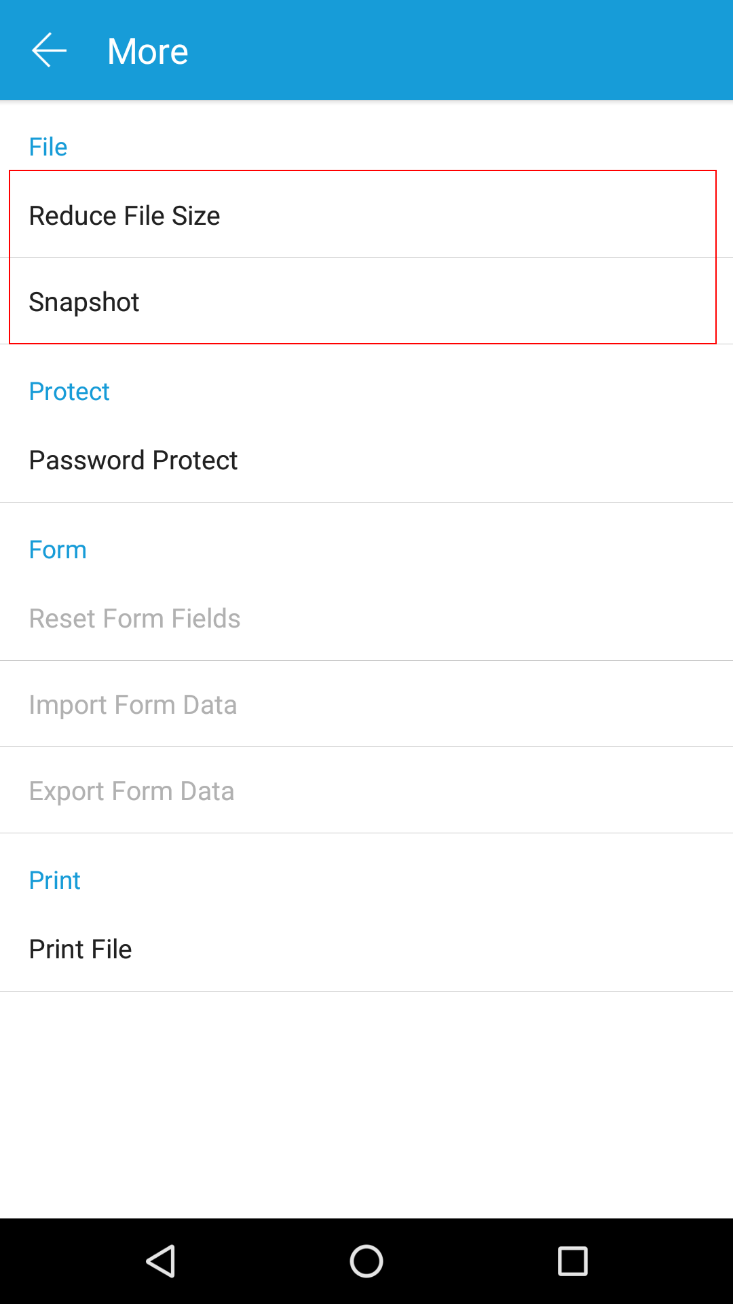
Example 4: Hide the “Properties” in the More Menu view with changing the layout.
// Get MenuViewImpl from MoreMenuModule.
MoreMenuModule moreMenuModule = (MoreMenuModule) mUiExtensionsManager.getModuleByName(Module.MODULE_MORE_MENU);
MenuViewImpl menuView = (MenuViewImpl) moreMenuModule.getMenuView();
menuView.setItemVisibility(View.GONE, MoreMenuConfig.GROUP_FILE, MoreMenuConfig.ITEM_DOCINFO);
Before:
After:
 For other items in the More Menu view, you can refer to the above examples, and just need to change the parameter value in the setGroupVisibility and setItemVisibility interfaces.
To show one of the UI elements in the More Menu view, just set the value of the parameter “visibility” in setVisibility and setItemVisibility interfaces to “View.VISIBLE“.
Updated on May 16, 2019